Installing to Windows

Install
Installation of software required for development
RTC development requires installation of Python, CMake, Doxygen, and Visual Studio.
Visual Studio
It is necessary not only for developing the C ++ version, but also for building the installer when creating the Python version and Java version of the RTC. Install it by downloading from the link, or obtain and install Visual Studio 2019/2022/2026 separately.
The latest version of Visual Studio that has been confirmed to work is 2026.I often forget to include the C ++ development environment. We recommend that you read the following instructions.
Python
Python is used not only for developing the Python language version of RTC, but also for various tools of OpenRTM-aist, so it must be installed. Python supported by OpenRTM-aist is 3.10, 3.11, 3.12, 3.13, 3.14. We recommend that you install the latest version.
Please note the following points when installing.- The Python installation destination corresponds to the selection [Customize installation] at the time of installation.
- For the procedure to specify the installation destination in [Customize installation], see the explanation on the following page.
CMake
CMake is required to automatically generate the files required for build (Visual Studio project file, Makefile on Linux, etc.) in various environments such as Windows and Linux.
Please install the latest version as much as possible.
- CMake(3.11以上推奨)
- cmake-4.3.3-windows-x86_64.msi (64bit)
- During the installation, you will be asked what to do with system PATH as [Install Options], it is recommended that you select Add CMake to the system PATH for all users.
Doxygen & Graphviz
Doxygen is a tool that automatically generates documents from comments such as source code.
Graphviz is a tool required to generate diagrams such as class diagrams when generating documents with Doxygen.
In OpenRTM-aist, various design information can be entered in RTCBuilder when designing RTC, and they are output as comments in the source code. By processing this with Doxygen, you can generate a beautiful RTC document.
Please install the latest version as much as possible.
- Doxygen
- doxygen-1.17.0-setup.exe
- If you are using Microsoft Edge and cannot download, please see the explanation for OpenRTM-aist.
During the installation, you will be asked what to do with the system PATH as the Install Options, but we recommend that you select Add Graphviz to the system PATH for all users. Download and execute the Windows version binary executable file from the web page.
After installation, run dot -v at the command prompt and check that the plugin information is displayed.
>dot -v
JDK8
Required when developing in Java versions of OpenRTM. Please see the explanation on the following page.Install OpenRTM-aist
After installing the above software, install OpenRTM-aist.
Download installer
Download and execute "msi" file.
| OpenRTM-aist-2.1.0-RELEASE_x86_64.msi | MD5:e1804a5aaa4fab85a5cdc777bd9c48c1 | 719MB |
This installer contains the following.
- Development environment for C ++
- OpenCV 4.13.0
- Past versions of DLLs for C ++ (Required when running the old RTC)
- Development environment for Python
- Development environment for Java
- omniORB 4.3.4
- OpenRTP (GUI tool, RTCBuilder,RTSystemEditor)
- JRE8 environment (Required for OpenRTP)
- VCVerChanger (GUI tool)
- rtshell (CUI tool)
Install
Please see the following page for details on the installation process. Try running the sample components to see if they are installed correctly. For details on system environment variables set by the installer, files to be installed, etc., see the following page.Checking system environment variables
The system environment variable RTM_VC_VERSION is set to match the installed Visual Studio version. After installation, this environment variable expands to the value vc16, but we have confirmed that in some cases it may not expand due to Windows behavior. Therefore, we recommend checking the system environment variable with VCVerChanger.
Enter VCVerChanger in the search bar and launch it. Once launched, press the "確認" button, check the displayed path, and then press "終了".

Install Visual Studio Community
Install Visual Studio Community 2026
Obtaining the Installer
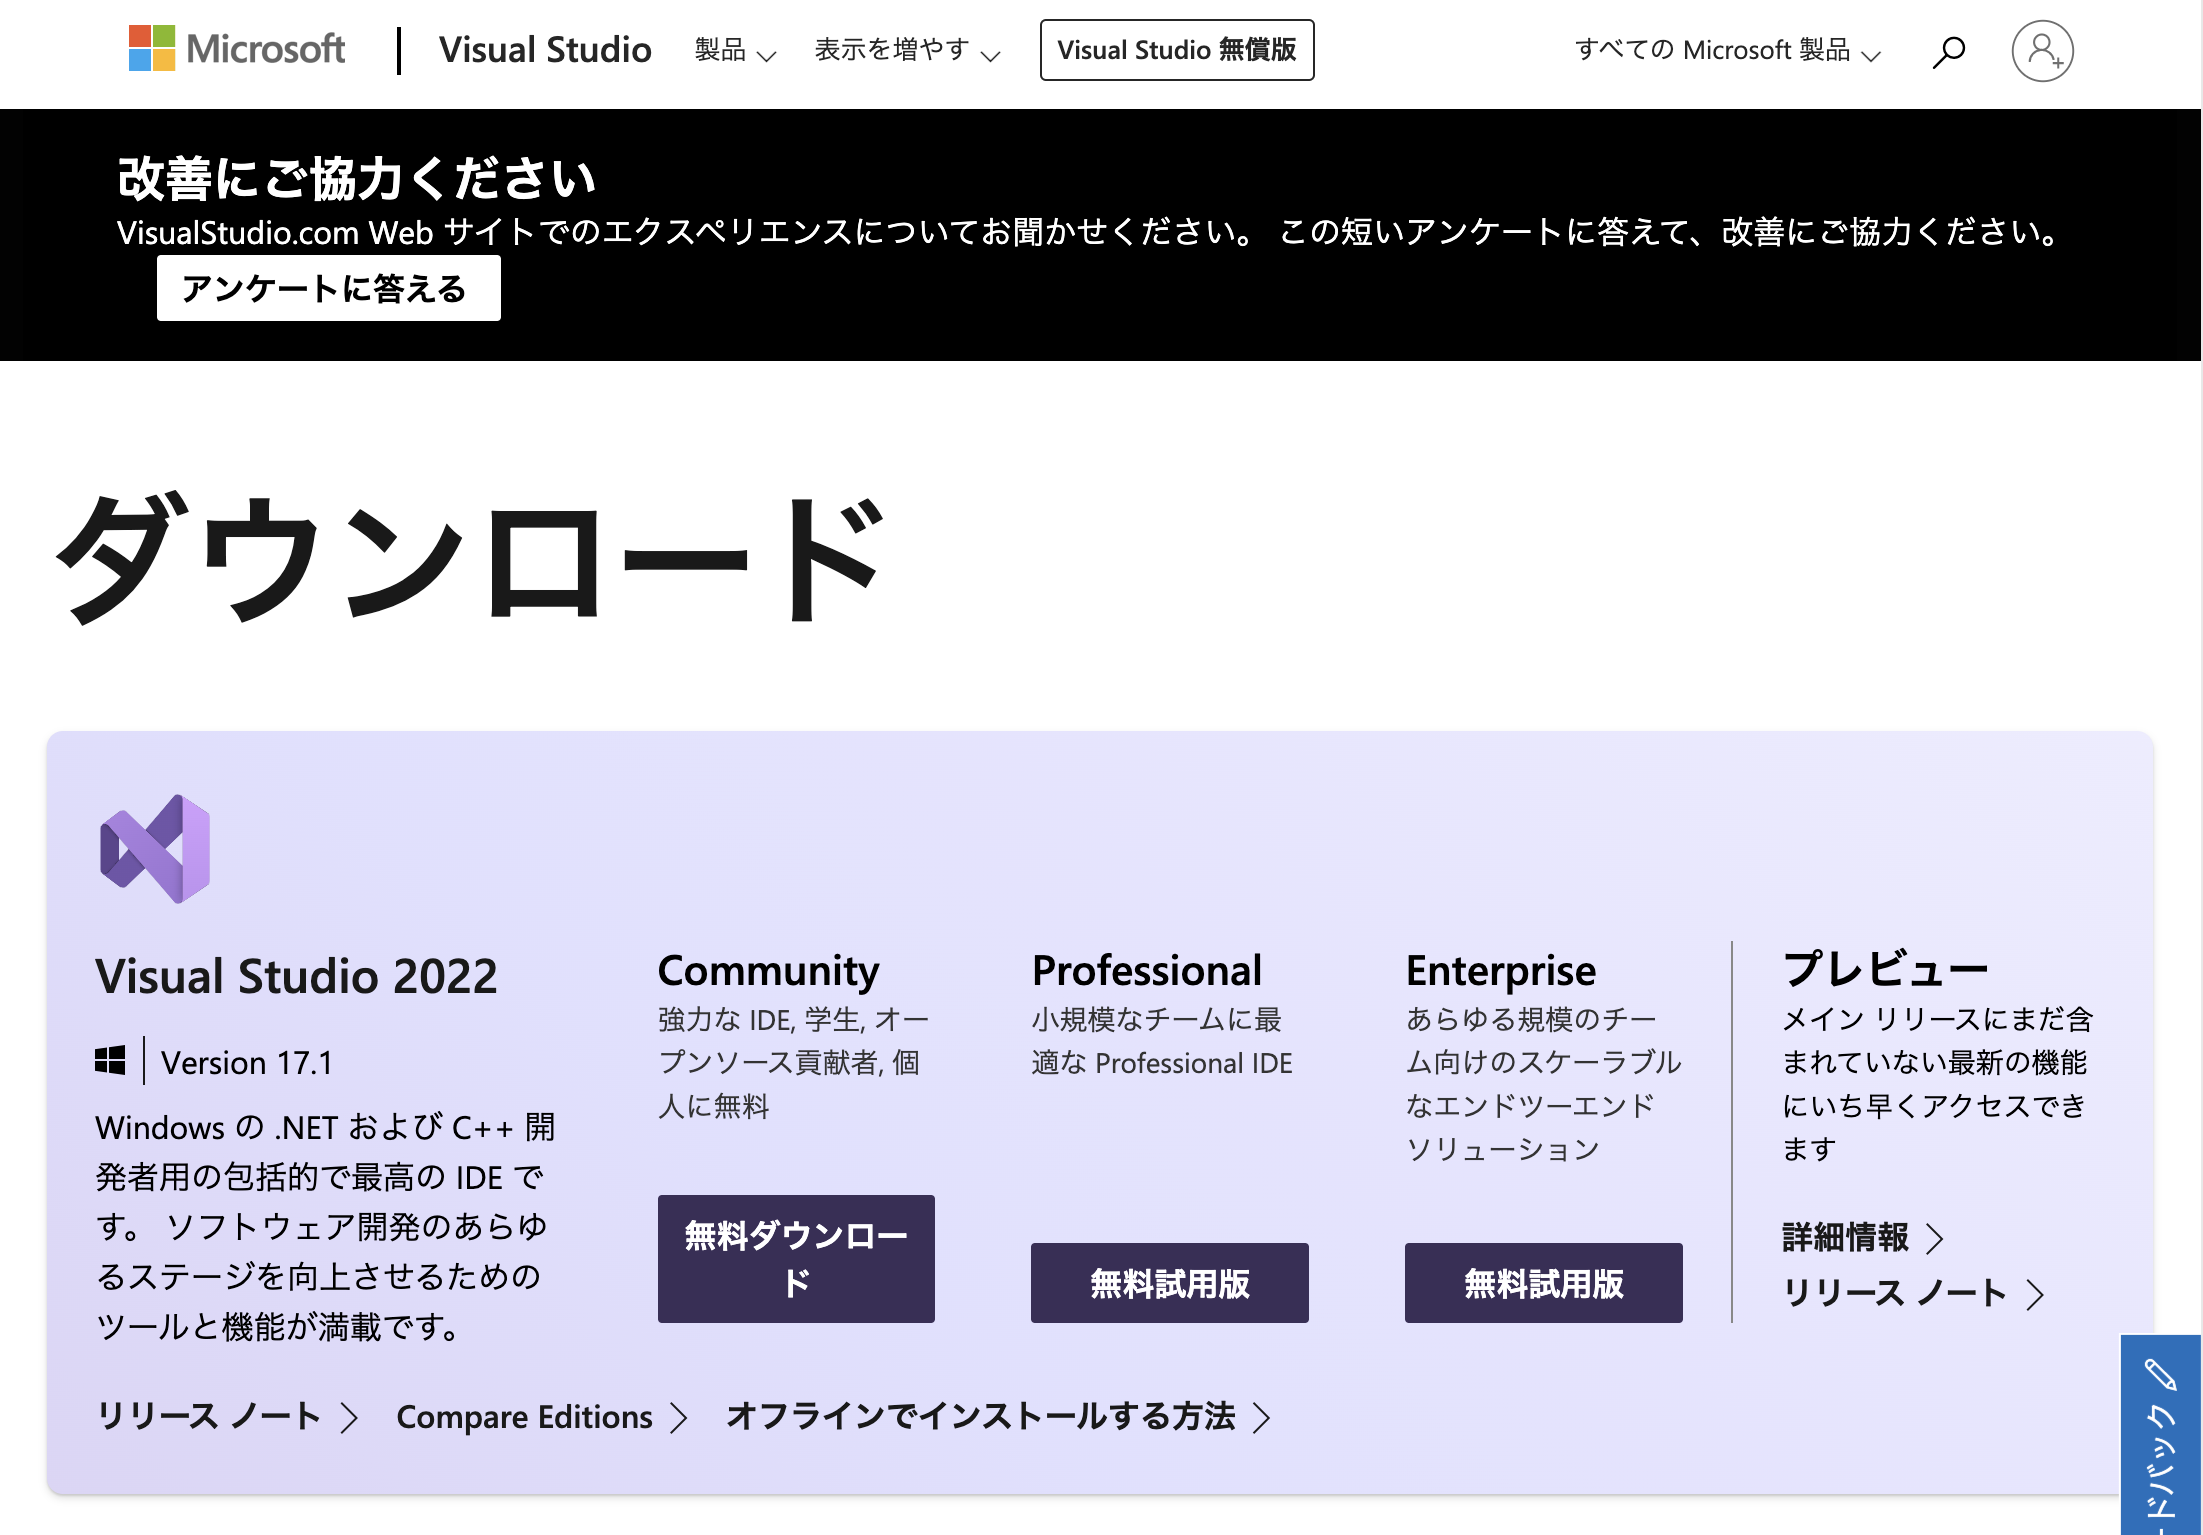
Please download the Visual Studio Community 2026 installer from the following page.
Click the [Free download] button under the edition labeled [Community] to start downloading the installer.
The installation procedure will be explained using version 2022 as an example.
Running the Installer
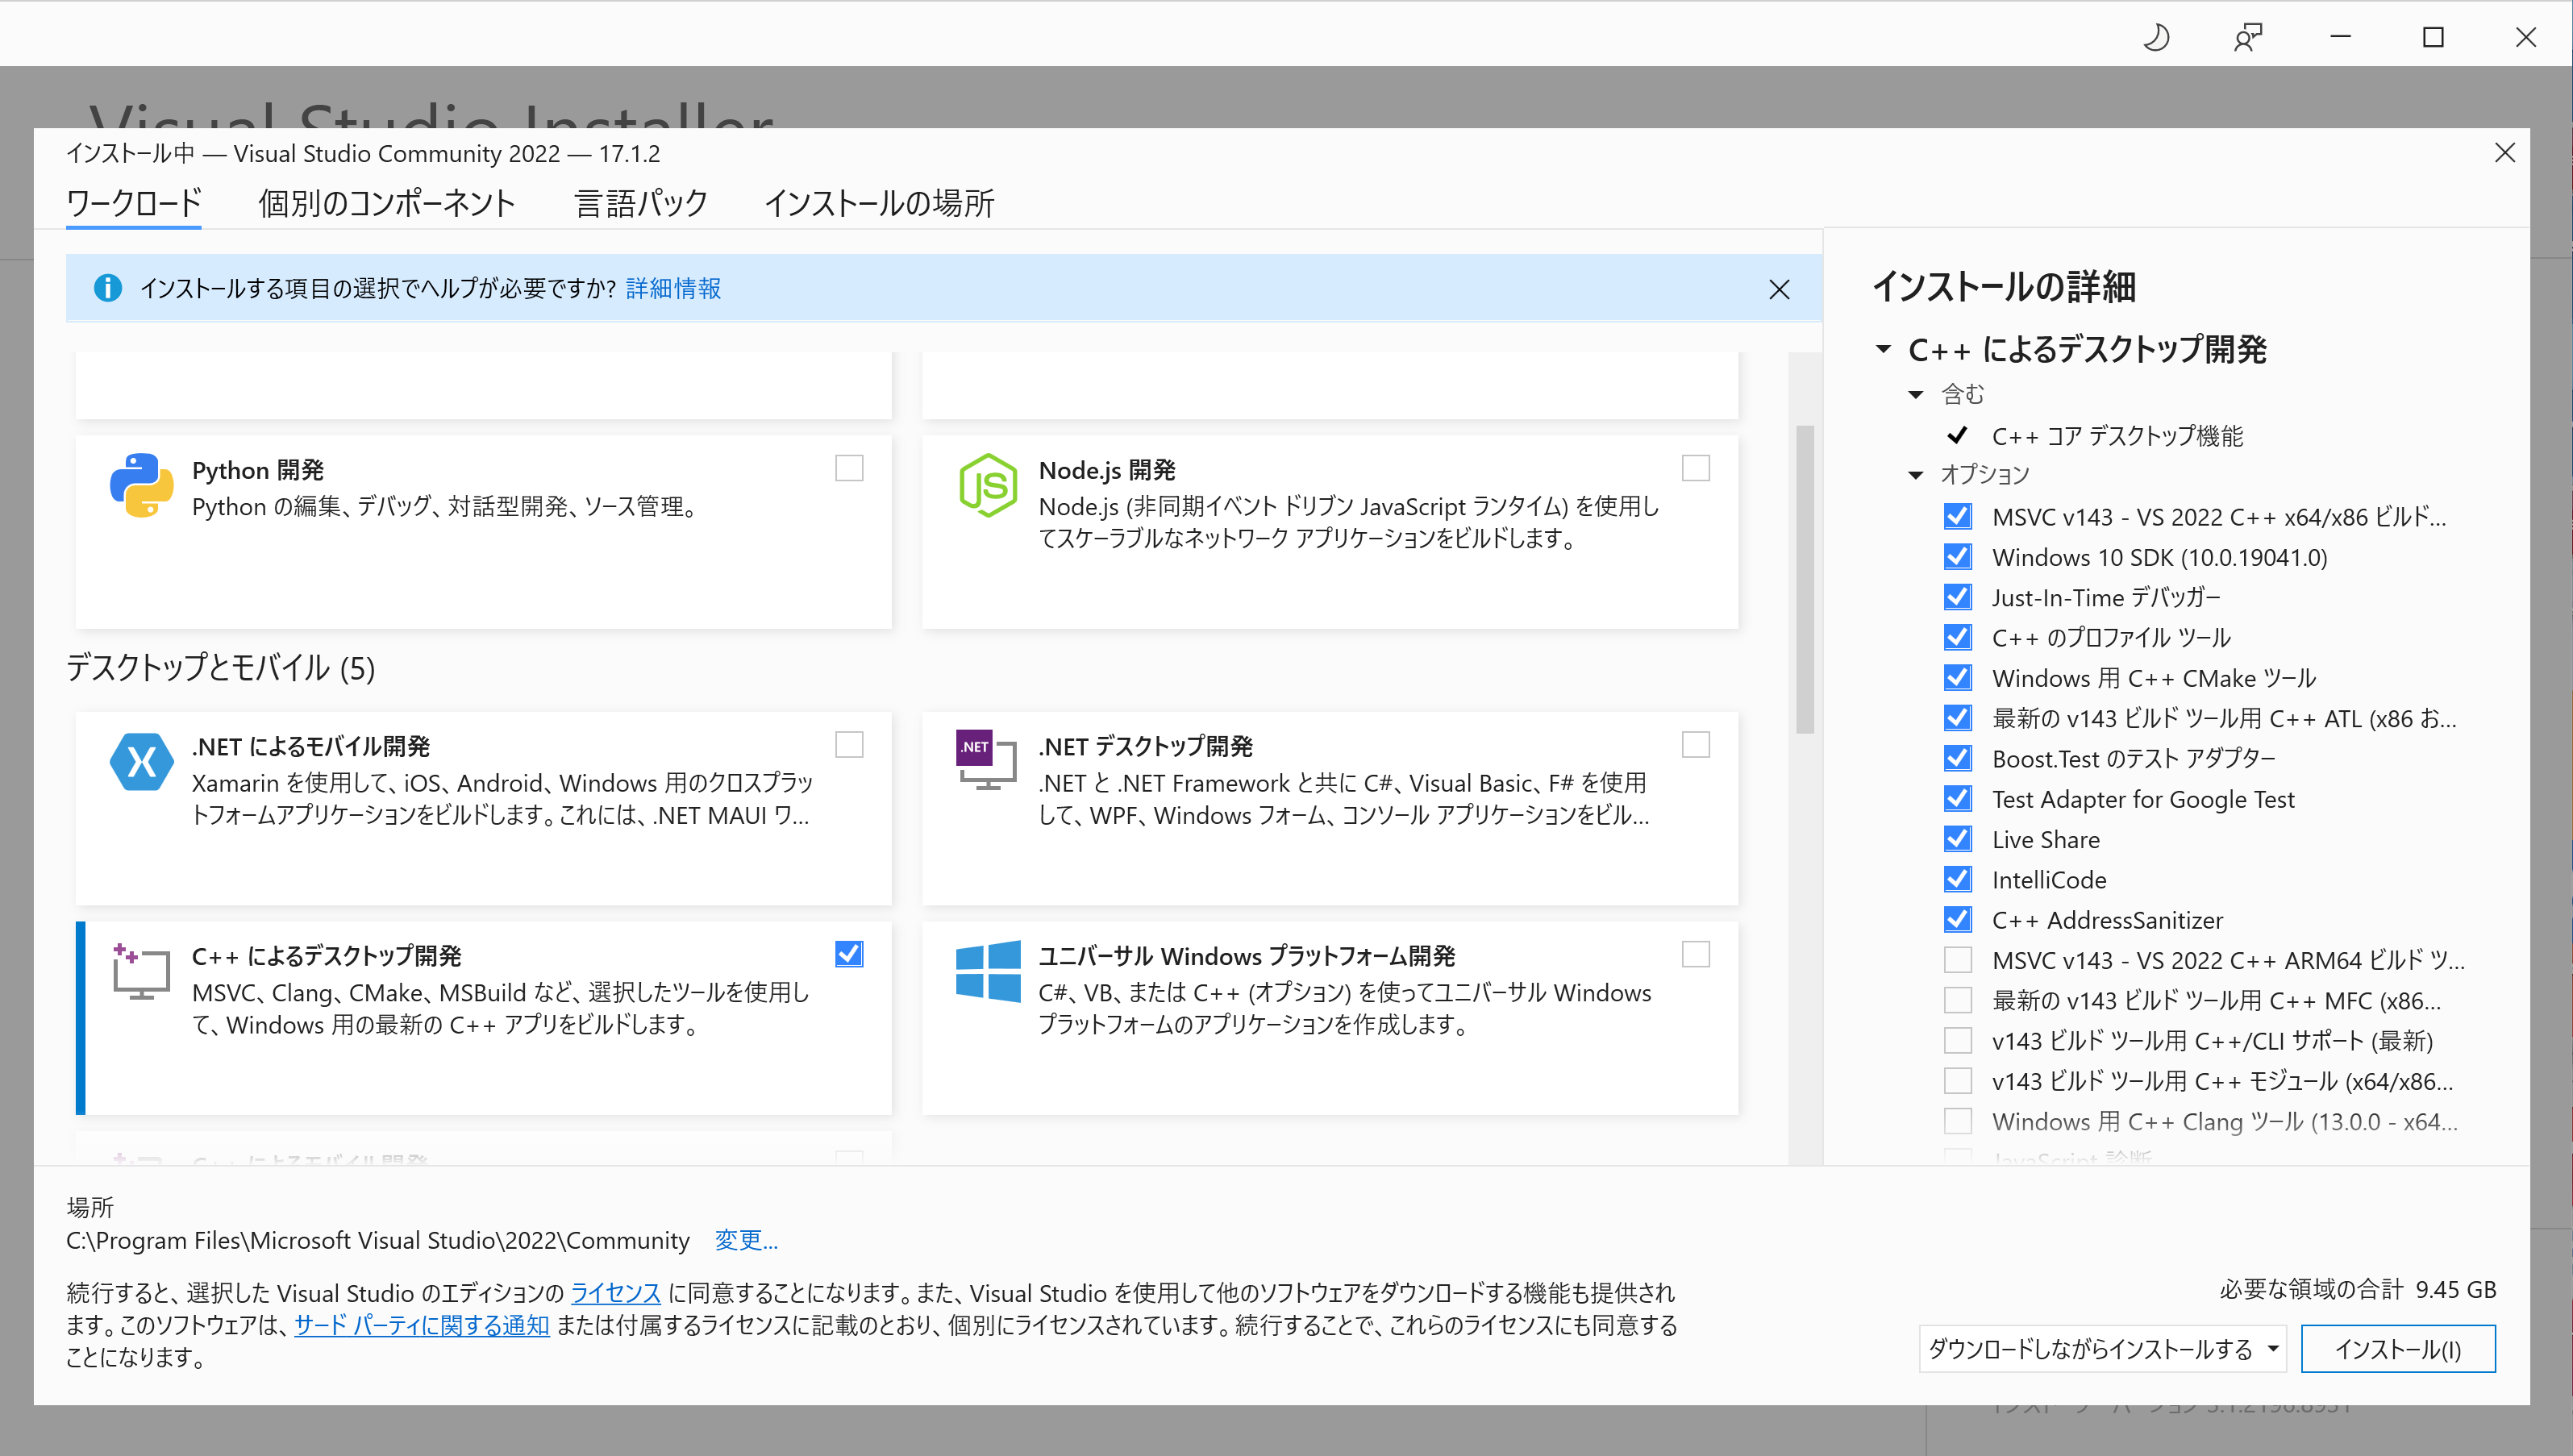
After the download is complete, open and run the downloaded file.
Follow the instructions, and when the screen shown below appears, check [Desktop development with C++] and click the [Install] button.
Verifying the Installation
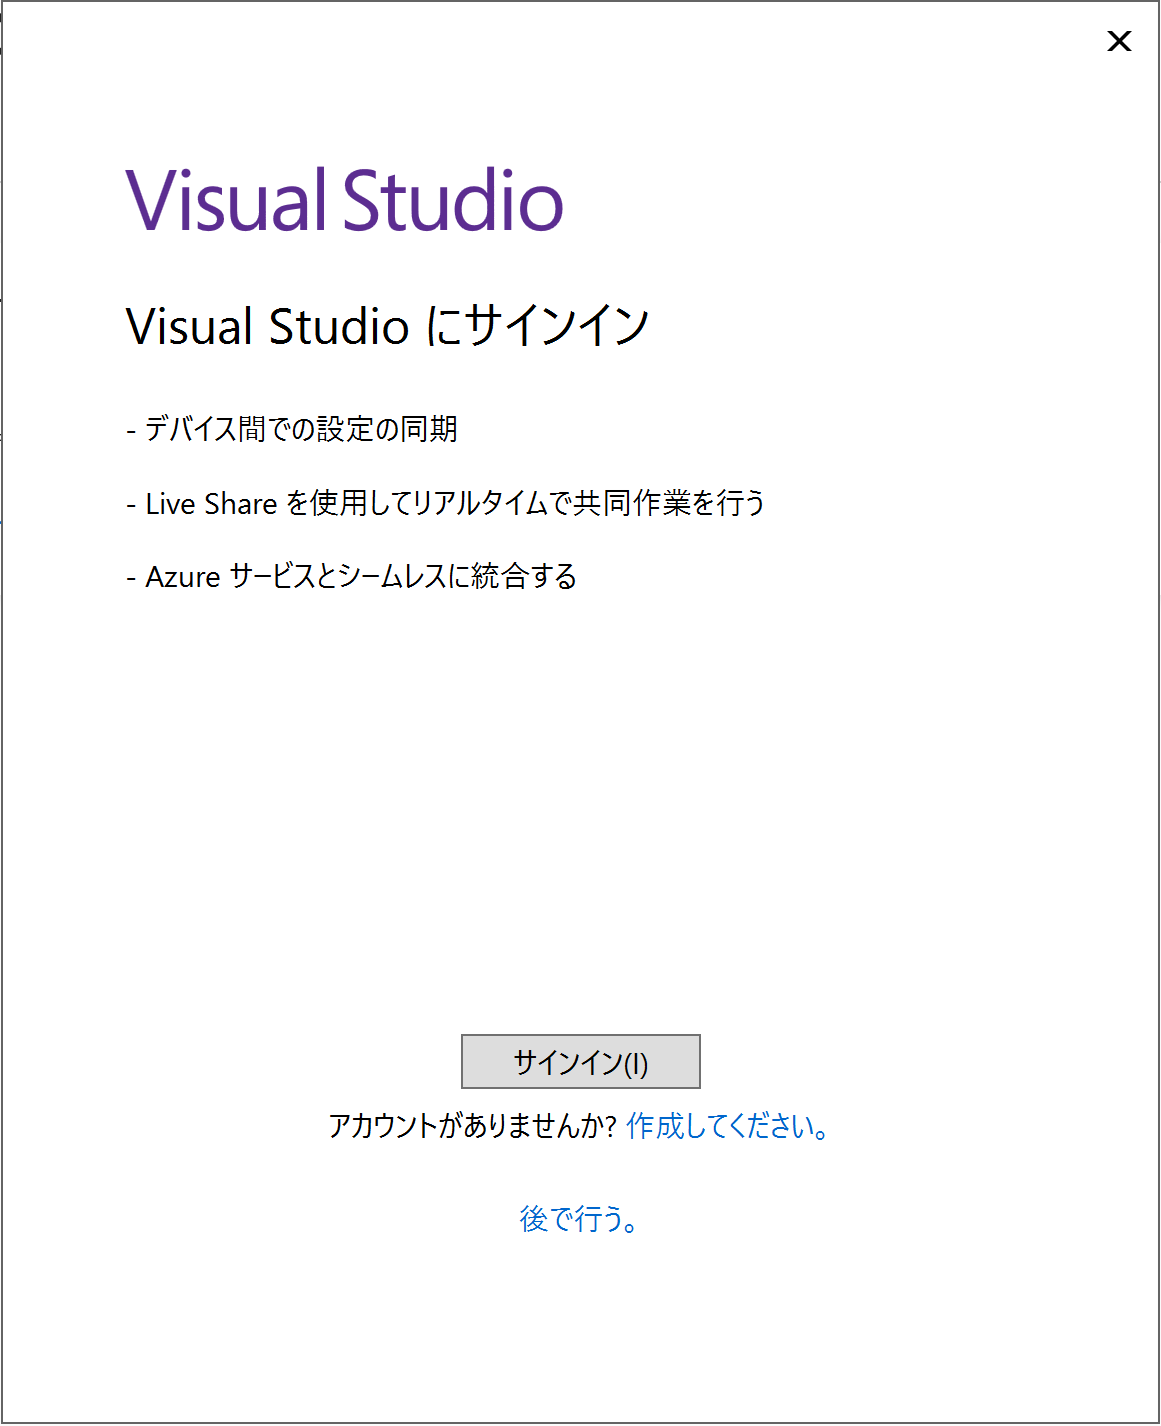
After the installation is complete, a sign-in screen will appear. Sign in with your Microsoft account.
You can use Visual Studio for 30 days without signing in.
For information about creating a Microsoft account, please refer to the following page.
How to create a new Microsoft account
Verifying That the C++ Compiler Is Installed
Be sure to verify that the **Desktop development with C++** workload has been installed.
If you can create a Visual C++ project, the installation is successful.
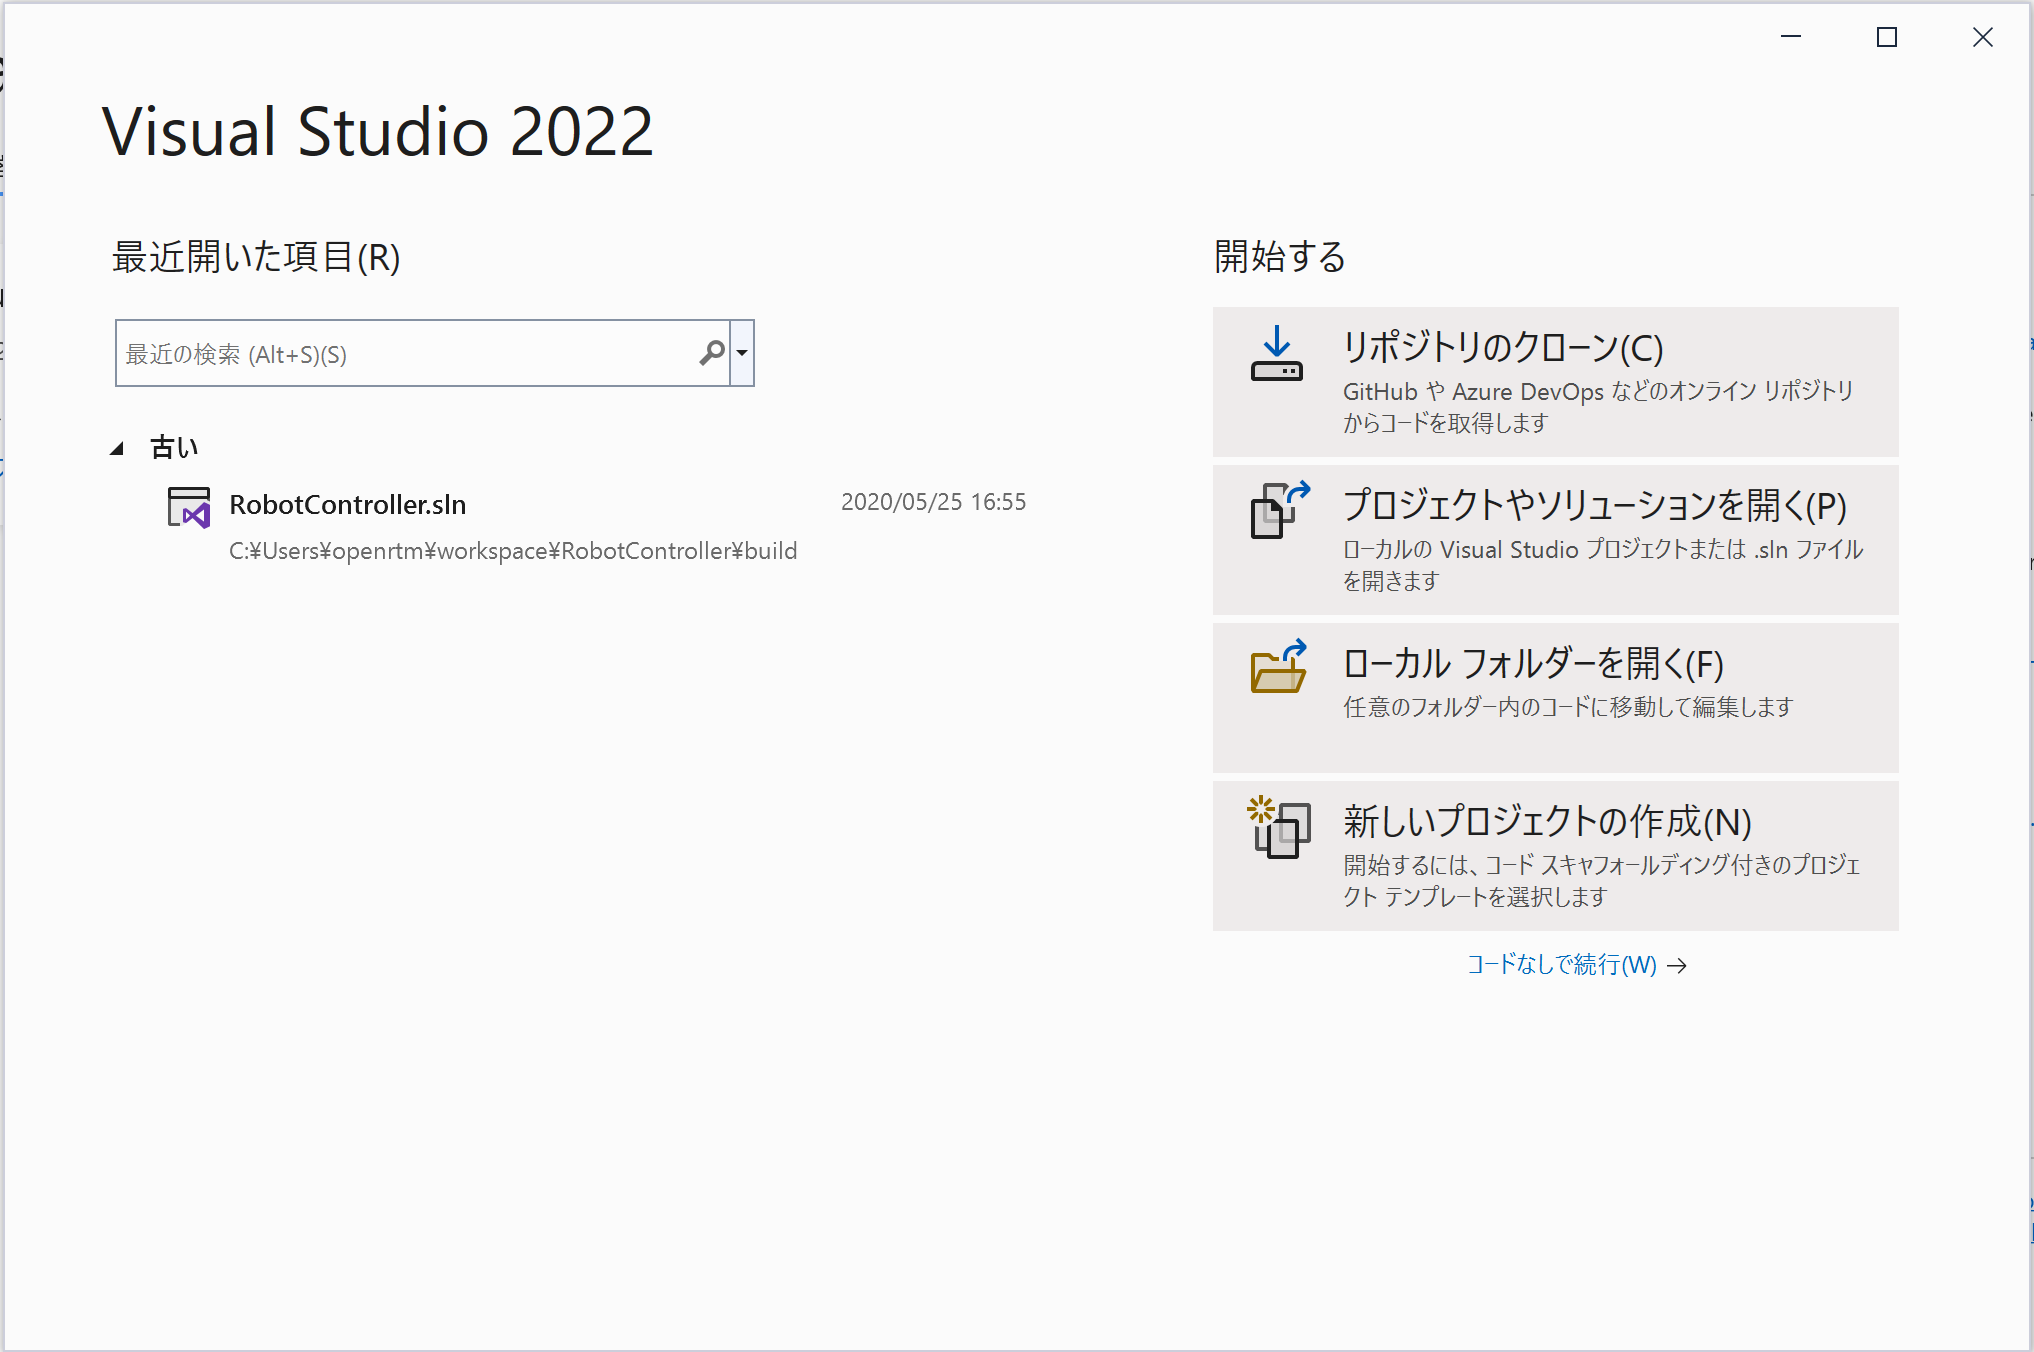
First, click [Create a new project].
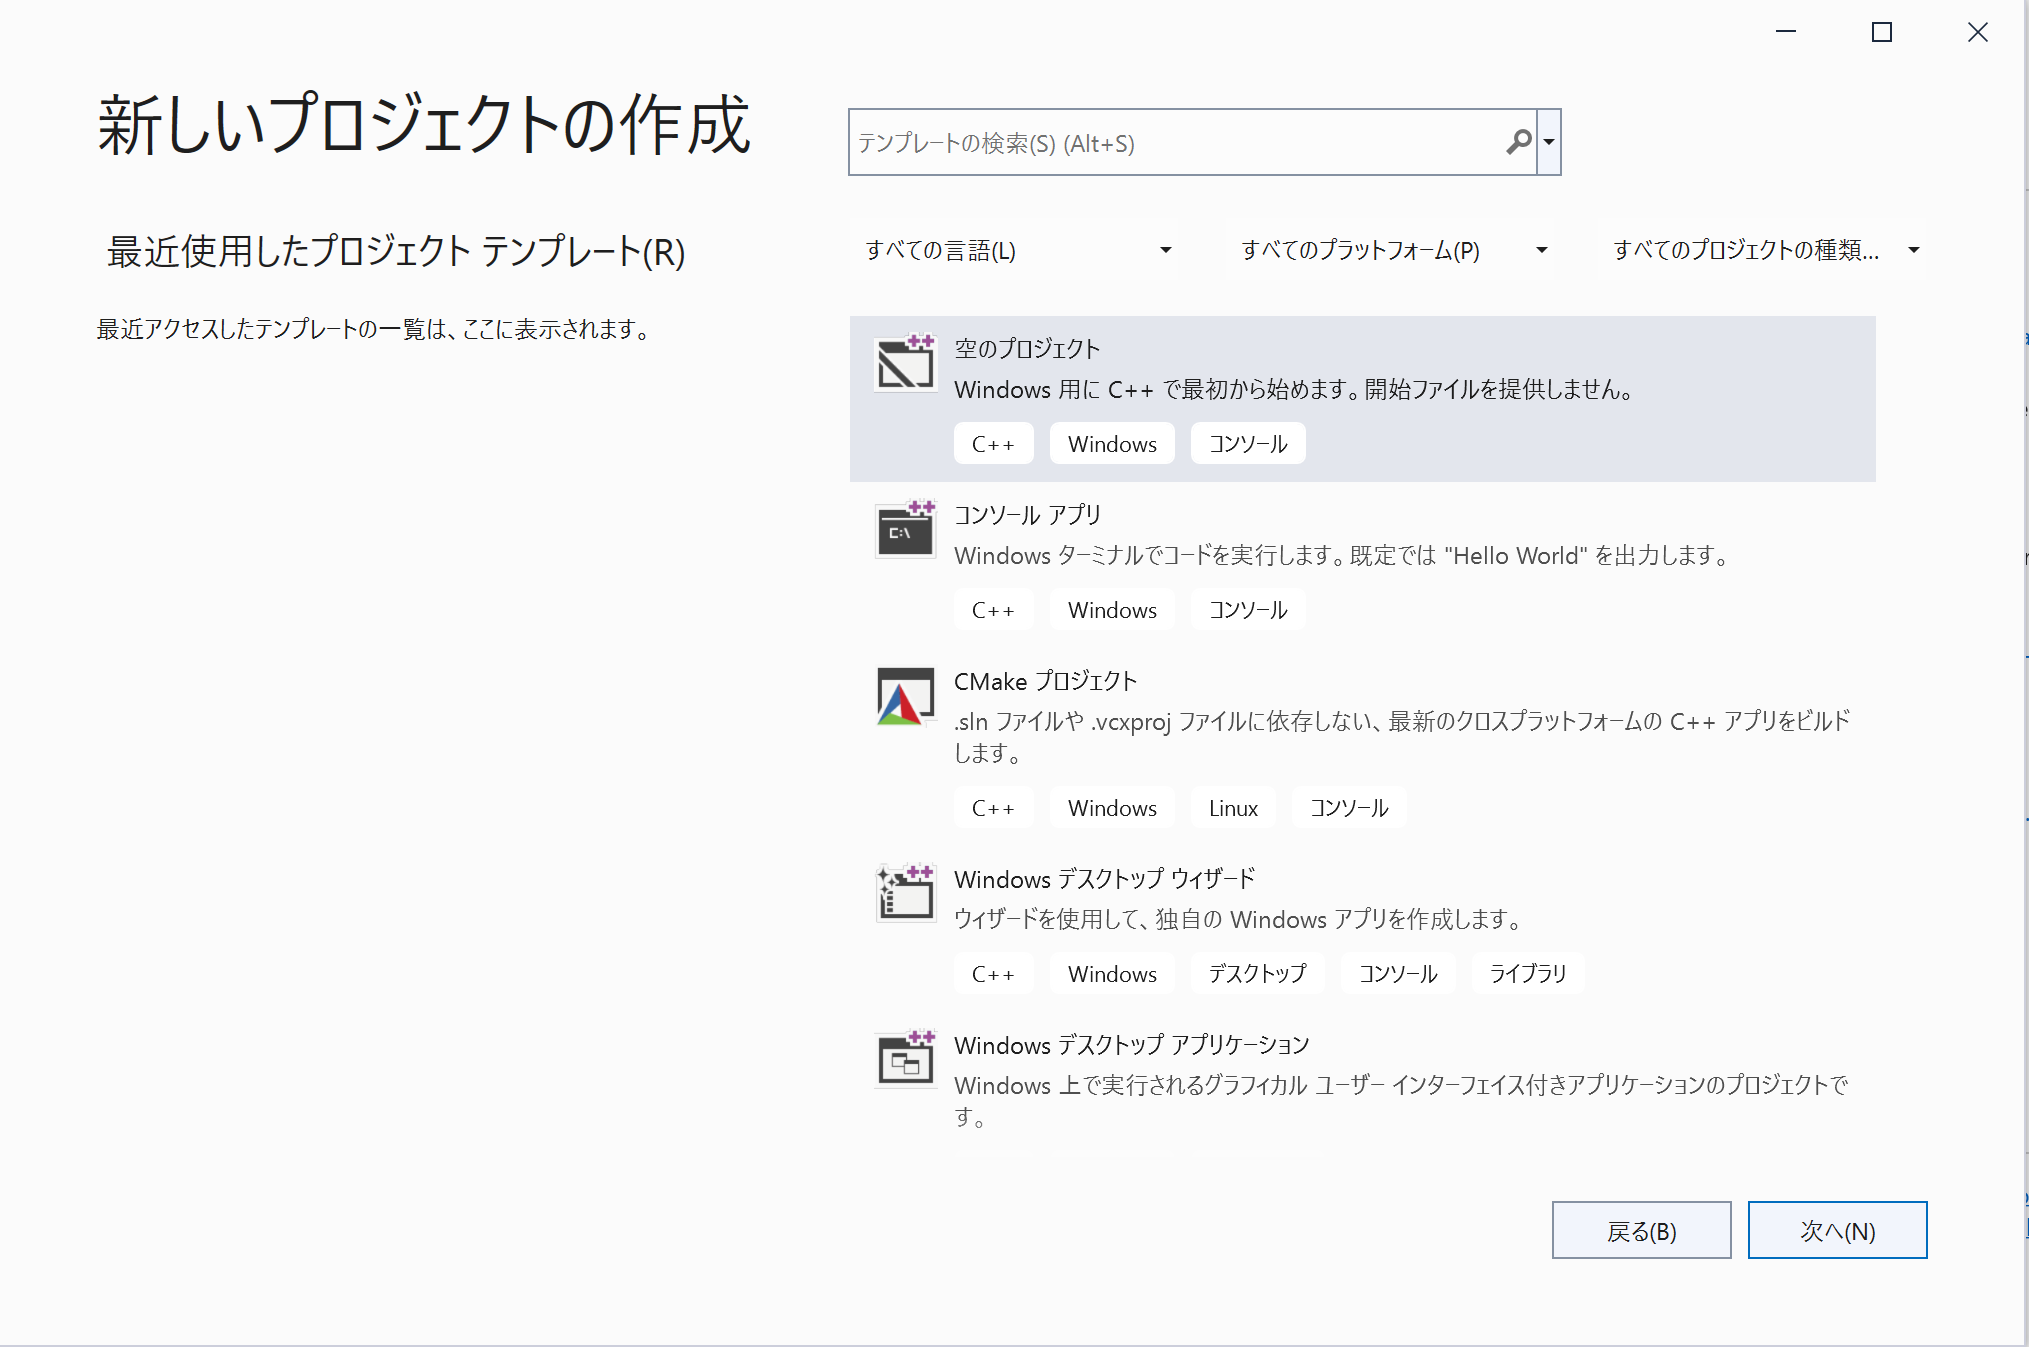
At this point, if options such as the following are available:
[Empty Project
Start from scratch with C++ for Windows. No starter files are provided.]
then the installation has been completed successfully.
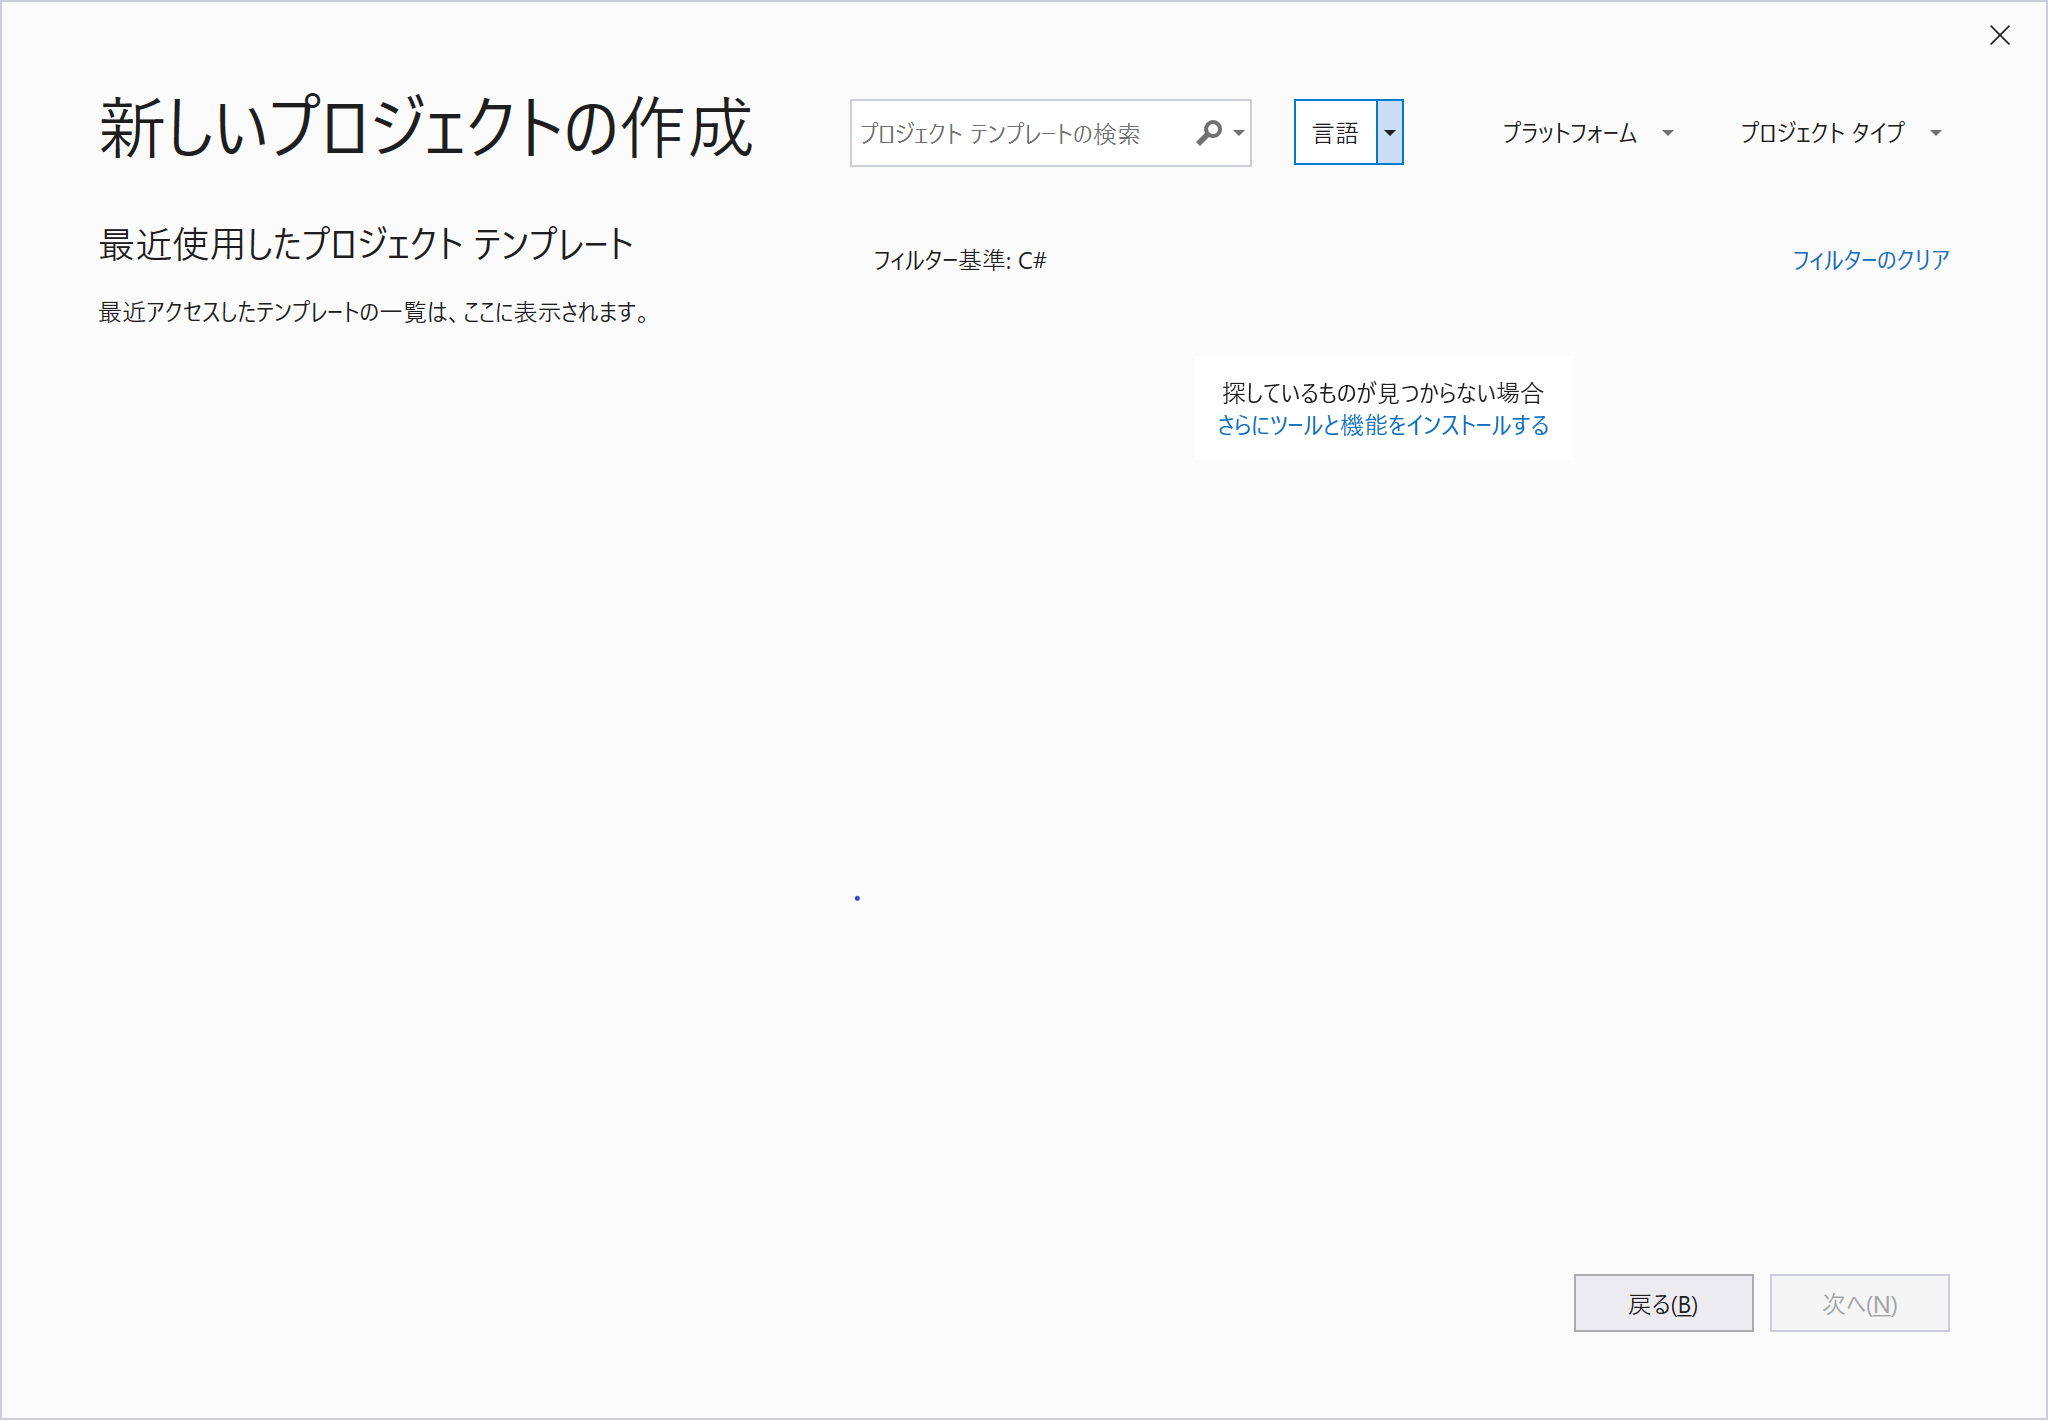
If it has not been installed, click:
[Can't find what you're looking for?
Install more tools and features]
This will launch the installer. Install the [Desktop development with C++ ] workload.
Operation Check
Run the sample component
After successful installation, you can check the operation with the attached sample component. We have prepared a bat file, so you can start it by double-clicking it.
The bat file is easily accessible by opening the start menu folder from [OpenRTM-aist 2.1.* x86_64] in the start menu.There is a bat file under each folder of "C ++_Examples" "C ++_OpenCV-Examples" "Python_Examples" "Java_Examples". For more information, see Let's start OpenRTM-aist in 10 minutes!.
- Let's start OpenRTM-aist in 10 minutes!・Run the sample component
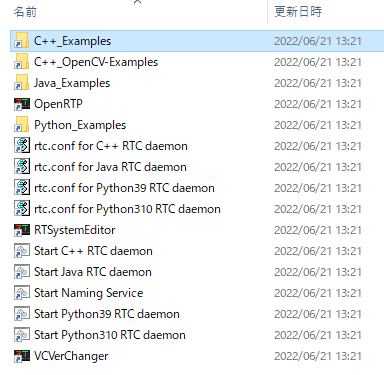
Start menu folder
The installation destination of the sample component is as follows.
 C:\Program Files\OpenRTM-aist\2.1.x\Components\C++\Examples
 C:\Program Files\OpenRTM-aist\2.1.x\Components\Python
 C:\Program Files\OpenRTM-aist\2.1.x\Components\Java
 C:\Program Files\OpenRTM-aist\2.1.x\Components\C++\OpenCV
List of sample components
Below is a brief description of the included sample components and a link to a page that explains how to use them.
Included with C ++, Python, and Java
| bat file name | brief description of the sample component | Explanation page |
| ConsoleIn.bat ConsoleOut.bat |
ConsoleIn.bat : Start ConsoleIn component that outputs the number entered from the console from OutPort. ConsoleOut.bat :Start ConsoleOut component that displays the number entered in the InPort on the console. |
SimpleIO |
| SeqIn.bat SeqOut.bat |
SeqIn.bat : Start SeqIn component that outputs random numbers (Short, Long, Float, Double and their sequence types). SeqOut.bat : Start SeqOut component that displays the numbers (Short, Long, Float, Double and their sequence types) that will be input to the InPort. |
SeqIO |
| MyServiceProvider.bat MyServiceConsumer.bat |
MyServiceProvider.bat : Start MyServiceProvider component that provides a service of type MyService. MyServiceConsumer.bat : Start MyServiceConsumer component that provides the MyService type service.。 |
SimpleService |
| ConfigSample.bat | Start ConfigSample component, which is an example of using the Configuration function. This is a sample to understand the behavior of Configuration by changing Configuration from RtcLink. | ConfigSample |
| Composite.bat | Start composite component creation sample PeriodicECSharedComponent component. It combines three sub-components, Sensor, Controller, and Motor. It is a good idea to connect to a component such as ConsoleIn and use it. | Composite |
Included with Python
| bat file name | brief description of the sample component | Explanation page |
| TkJoystickComp.bat | Sample GUI component using Tcl/Tk. Simple joystick component. | TkJoyStick |
| TkMobileRobotSimulator.bat | A simple simulator for mobile robots. The speed of the robot is received by InPort, and the position after movement is output from OutPort. | TkMobileRobotSimulator |
| TkMotorComp.bat | Sample GUI component using Tcl/Tk. GUI displays how the InPort rotates at the speed of the value received. | TkMotorComp |
| SliderComp.bat | Sample GUI component using Tcl/Tk. Output the value specified by Slider from OutPort. | SliderComp |
| TkMotorPosComp.bat | Sample GUI component using Tcl/Tk. GUI displays how the value received by InPort moves as the angle of rotation. | TkMotorPosComp |
| TkLRFViewer.bat | Sample GUI component using Tcl/Tk. Display the data output from the laser range sensor, etc. | tkLRFViewer |
| AutoControl.bat | Output speed with a component for mobile robots. The data of the positioning sensor is received by InPort, the speed of the robot is calculated, and it is output from OutPort. | Autocontrol |
Included with Python, and Java
| bat file name | brief description of the sample component | Explanation page |
| ExtConsoleIn.bat ExtConsoleOut.bat ExtConnector.bat |
ExtConsoleIn.bat : Console controlled by an external trigger Starts a component that outputs the input numerical value from Outport. ExtConsoleOut.bat : Starts a component that outputs the numerical value input to the Inport controlled by an external trigger to the console. ExtConnector.bat : Launches a program that sends external triggers to ExtTrigger / ConsoleInComp.class or .py and ExtTrigger / ConsoleOutComp.class or .py. |
ExtTrigger |
Included with Java
| bat file name | brief description of the sample component | Explanation page |
| GUIIn.bat | Launch a GUI sample that outputs the slider position from Outport. You can also connect to ConsoleOutComp.class. | GUIIn |
OpenCV C ++ version
| bat file name | brief description of the sample component | Explanation page |
| Affine.bat | Affine transforms the input image. | |
| BackgroundSubtractionSimple.bat | Outputs the change from the image when the key was input in the input image. | |
| Binarization.bat | Converts an input image to a binary black and white image. | |
| CameraViewer.bat | The image received by ImPort is displayed on the screen. | CameraViewer |
| Chromakey.bat | Extracts an object by removing a specific color from the image. | Chromakey |
| DialationErosion.bat | Perform dialing / erosion processing | |
| Edge.bat | Outputs the first-order derivative image in the X direction, the first-order derivative image in the Y direction, and the Laplacian image (second-order derivative image) | |
| Findcontour.bat | Extract the outline and display the outline in the image. | |
| Flip | Invert the image. | Flip usage example |
| Histgram.bat | Displays changes in histogram while changing brightness / contrast of black and white image | |
| Hough.bat | Line extraction by Hough transform | |
| ImageCalibration.bat | Calibrate the camera. | Automatically start from TkCalibGUI |
| ImageSubtraction.bat | Background image is extracted from the input image, the foreground image part is output as a mask image and the background image is output. | ImageSubtraction |
| ObjectTracking.bat | Tracks an object selected on the screen and show the position by a red oval. | ObjectTracking |
| OpenCVCamera.bat | Output the captured image of the USB camera from OutPort. | OpenCVCamera |
| Perspective.bat | Perspective conversion of image (Convert as viewed from below. | |
| RockPaperScissors.bat | Judgment of Goocho kipper in image. | |
| Rotate.bat | Rotates and scales images | |
| Scale.bat | Processes images for scaling | |
| Sepia.bat | Separates images | |
| SubtractCaptureImage.bat | Updates the background in real-time using the dynamic background subtraction method. | SubtractCaptureImage |
| Template.bat | Template matching | |
| TkCalibGUI.bat | GUI for ImageCalibration component that performs camera calibration. | TkCalibGUI |
| Translate.bat | Performs two-dimensional translation of images |
Build from the source code (C++)
If you want to modify OpenRTM-aist itself and use it on Windows, you can get the source code of OpenRTM-aist and build it. Since CMake is supported from 2.0 series, the procedure is different from 1.2 series.
Required software and libraries
Following software is required. For details, see Installation of OpenRTM-aist 2.1 series on Windows
- Visual Studio
- Python
- CMake
- Doxygen & Graphviz(If you also want to do a document build.)
- omniORB 4.3.4
The pre-built binary package provided by openrtm.org is available under the name omniORB-4.3.4-x64-vc16-pyXX.zip at the link below. Please replace it with the version of python to install XX, download the appropriate one, and extract it to a suitable location (C:\workspace\omniORB in the explanation below).
For more information on building with other libraries, see RT System Development (Advanced)・Build process of OpenRTM-aist(C++) by using CMake
Command procedure at build/installation
Get the source code. Check out the master branch for the latest OpenRTM-aist 2.1 source, and v2.1.0 for the 2.1.0 release source.
 git clone https://github.com/OpenRTM/OpenRTM-aist
 cd OpenRTM-aist
 git checkout -b v210-src refs/tags/v2.1.0
- -DORB_ROOT : Downloaded and unzipped omniORB path
- -G :Visual Studio version("Visual Studio 18 2026" "Visual Studio 17 2022" "Visual Studio 16 2019" etc.)
- -DCMAKE_INSTALL_PREFIX : Installation path from source
 mkdir build
 cd build
 cmake -DORB_ROOT=C:/workspace/4.2.5-x64-vc16-py314 -G "Visual Studio 18 2026" -DCMAKE_INSTALL_PREFIX=C:/workspace/openrtminstall ..
Then execute the following command. Finally, if you see the following, the build is successful.
 cmake --build . --verbose --config Release
 The build was successful.
     0 Warnings
     0 Error
If the build is successful, complete the installation with the following command:
cmake --build . --config Release --target install
Batch processing with script
I will introduce a script (OpenRTM-build-Windows.bat) that batch processes from download of omniORB to source build and installation. It is executed by placing it under the OpenRTM-aist directory that has been git cloned.
 cd OpenRTM-aist
 copy scripts\OpenRTM-build-Windows.bat .
 OpenRTM-build-Windows.bat > build.log
This OpenRTM-build-Windows.bat file is used during the build process for integrating it into the Windows Installer MSI. Please use only the necessary options when using CMake.
What the installer does
What the installer does
The installer copies the files and configures the system according to the following work contents. It is described below for reference when confirming that the installation and uninstallation are performed correctly.
- Copy various files under the installation directory (C:\Program Files)
- Create an OpenRTM-aist folder under the start menu and set various shortcuts.
- Environment variable settings (when OpenRTM-aist 2.1.0 version is installed with default settings)
 RTM_BASE=C:\Program Files\OpenRTM-aist\
 RTM_ROOT=C:\Program Files\OpenRTM-aist\2.1.0\
 RTM_VC_VERSION=vc16
 RTM_JAVA_ROOT=C:\Program Files\OpenRTM-aist\2.1.0\
 RTM_IDL_DIR=C:\Program Files\OpenRTM-aist\2.1.0\rtm\idl\
 OMNI_ROOT=C:\Program Files\OpenRTM-aist\2.1.0\omniORB\4.3.4_vc16\
 OpenCV_DIR=C:\Program Files\OpenRTM-aist\2.1.0\OpenCV4.13.0\
 OpenRTM_DIR=C:\Program Files\OpenRTM-aist\2.1.0\cmake\
- Additional settings to PATH (when OpenRTM-aist 2.1.0 version is installed with default settings)
 C:\Program Files\OpenRTM-aist\2.1.0\bin\vc16\
 C:\Program Files\OpenRTM-aist\2.1.0\omniORB\4.3.4_vc16\bin\x86_win32\
 C:\Program Files\OpenRTM-aist\2.1.0\OpenCV4.13.0\x64\vc16\bin\
Files to be installed
The files are installed with the following structure.
 <install_dir>
   + OpenRTM-aist
      + 1.x.x  : Older version runtime
      + 2.0.x  : Older version runtime
      + 2.1.x
         + bin: dll、lib Various commands
         + cmake: OpenRTMConfig.cmake
         + coil: coil header files
         + Components
            + C++
               + Examples: C++ sample component
               + OpenCV: OpenCV C ++ sample component
            + Java: Java sample component
            + Python: Python sample component
         + ext: Extension module file
         + hrtm: HRTM Wrapper Library
         + jar: jar files
         + jre: AdoptOpenJDK JRE
         + omniORB 4.3.4
         + OpenCV 4.13.0
         + rtm: OpenRTM-aist header files
            + idl: OpenRTM-aistIDL files
         + util
            + OpenRTP: RTCBuilder and RTSystemEditor tools
            + RTSystemEditor:
            + VCVerChanger: Tool to specify the version of Visual Studio you are using